Welcome to this Quest Enterprise Reporter video demonstration. In many organizations, it's crucial to have information available at a moment's notice, for the sake of auditing and compliance. Enterprise Reporter addresses that need intuitively and easily, with both basic and granular reporting capabilities for a wide variety of Microsoft platforms. I'll be showing you how to create, manage, and run discoveries, as well as reports.
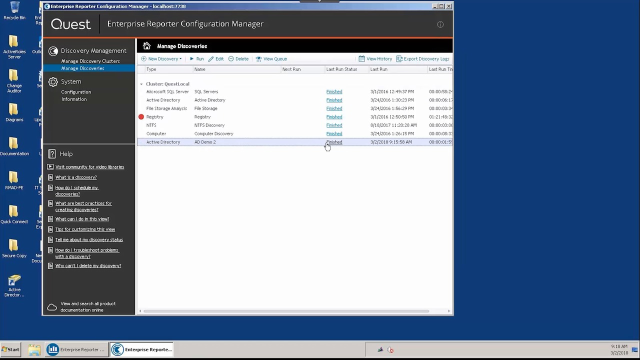
We'll be starting with the Configuration Manager, which can be accessed through the Start menu. Next, we create a discovery in the Manage Discovery section, so that we can gather the required data. Here you can run discoveries, edit existing ones, view history, and export logs.
Simply select New Discovery. And as you see, there can be discoveries run for many data types. We'll run an Active Directory discovery. You'll be presented with a wizard, with naming, cluster selection, and credentials options. We'll then click Next. Next, we define the scope. And in this scenario, we'll be gathering data from the entire domain. Simply select Add and include the domain in the scope, although we can make this more granular based on organizational units. There are also filter options.
Once the scope is included, click OK. At the bottom of the wizard, there are many options for additional data gathering for users groups, other types of objects-- including performance options. There is also integration with the One Identity active role solution, to include active roles attributes in your reporting.
Next, we can choose to schedules this discovery or even make it recurring. To do so, one would simply click Add. But in this case, we'll run it manually. We then click Finish.
To run the task manually, simply select it, right click, and click Run, or choose the Run option in the control panel. When the task is finished, we can view the details of the discovery. And we can then use the Report Manager to run reports containing the selected data that was gathered. The Report Manager has a similar layout, with a variety of pre-configured reports, as well as scheduling and configuration sections.
We'll now select Create Report and create an Active Directory report. In a wizard, we select which data we want to display in the report, and choose whether or not to use a predefined layout. Next, you can choose parameters and operators to govern the data displayed. In the Query tab, you can see the actual query being run on the data gathered in the SQL database.
Next, you can choose various options for layout, including auto generating a report layout, or designing a new one, using the Layout Editor. The CSV options tab contains options on what fields to include in the report. For this scenario, we'll edit the report and auto generate a generic template to run it. After selecting Run Report, we are presented with the report in the Report Viewer, containing all requested data in an organized, easy to read format. There are many options to view the data, including print options, email options, as well as export options to PDF.
We can also create schedules for any of these reports to run at desired intervals, and any environmental details are easily configured in the configuration section. Enterprise Reporter follows a similar workflow for most reports and provides an easy to use fast and accurate way of gathering any required data and an intuitive, easy to use interface.
This concludes the overview of Enterprise Reporter. For more information on Enterprise Reporter or to access our 30 day free trial, please visit us online. Thank you for watching.